
When was the last time you made something in your kitchen that genuinely surprised you? Not just tasted good, but stopped you in your tracks with how effortlessly perfect it turned out? That’s what this Ninja Creami vanilla ice cream recipe delivers. If you’re someone who loves homemade desserts but dreads complicated steps, the Ninja Creami is the missing link between craving and satisfaction.
You’re not just making vanilla ice cream. You’re making a moment—whether it’s a treat for yourself after a long day or a shared experience with someone you care about. And thanks to the Ninja Creami, you don’t need to be a professional or spend hours in the kitchen to make it happen.
Table of Contents
What Is the Ninja Creami and Why It’s Gaining Popularity
Before you dive into the recipe, it’s important to understand why the Ninja Creami is unlike any other frozen dessert maker you’ve come across. Instead of churning a liquid base over time, it starts with a frozen solid and processes it into a creamy texture in just a few minutes. That means no guessing if your ice cream is done or dealing with half-frozen results.
This machine has taken over kitchens for good reason:
- You can control what goes into your dessert.
- It handles traditional dairy as easily as plant-based options.
- It includes multiple settings (ice cream, sorbet, gelato, smoothie bowl, lite ice cream) so you’re never limited in creativity.
If you’re watching your sugar intake, managing dietary restrictions, or just enjoy experimenting with flavors, this machine gives you full control without sacrificing taste or texture.
Ingredients You’ll Need for the Creamiest Vanilla Base

Simple doesn’t mean boring. With the right ingredients and proper ratios, you’ll create a base that holds up against any premium store-bought pint. Here’s what you need:
Vanilla Ice Cream Base
| Ingredient | Quantity | Notes |
|---|---|---|
| Whole Milk | 1 cup | 2% or almond milk optional |
| Heavy Cream | ½ cup | Adds richness and structure |
| Granulated Sugar | ⅓ cup | Adjust to preference |
| Vanilla Extract | 1½ teaspoons | Use pure extract for best flavor |
| Salt | Pinch | Balances and enhances flavor |
If you’re following a specific diet, this recipe is easy to adjust. Use coconut milk or oat milk for a dairy-free version, or swap in monk fruit or erythritol for a low-carb twist.
Step-by-Step: How to Make Vanilla Ice Cream in the Ninja Creami
Now that your ingredients are ready, it’s time to put everything into motion. One of the key things to remember is that this process involves freezing before blending. That means some patience is needed upfront, but the reward is more than worth the wait.
Step 1: Prepare the Base
Combine all ingredients in a mixing bowl. Whisk until the sugar is dissolved and everything is fully blended. You want the texture to be smooth and slightly thick, not watery.
Step 2: Freeze the Base
Pour the mixture into a Ninja Creami pint container, ensuring the surface is level. Seal the lid and place it in your freezer for 24 hours. This part is crucial. The Creami only works correctly when the base is fully frozen solid.
Step 3: Process It into Ice Cream
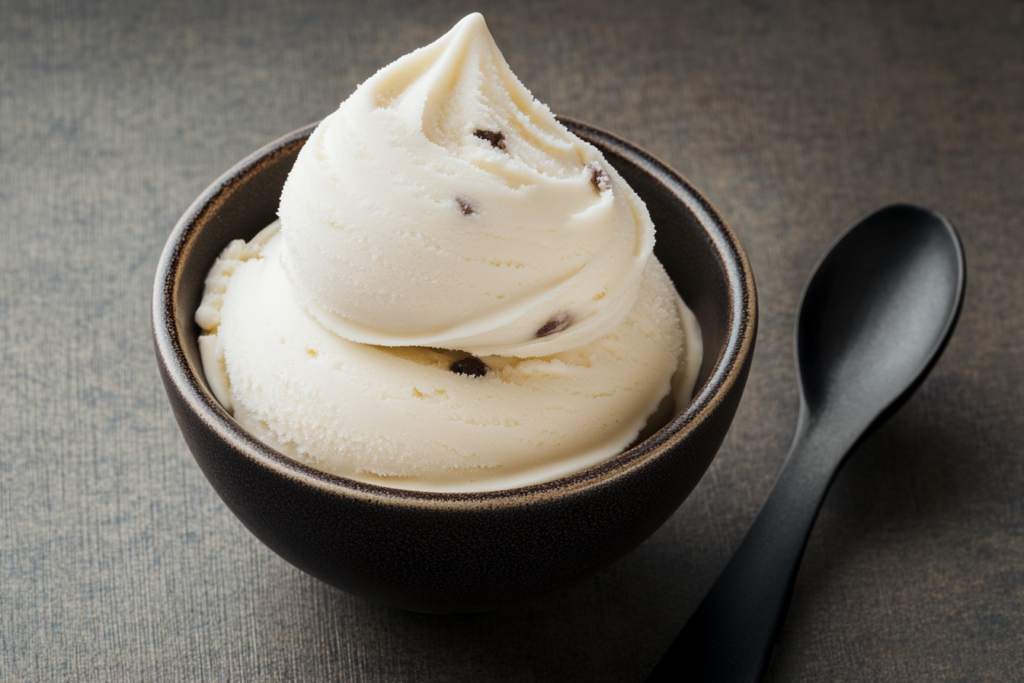
Once your base is frozen, install the pint into your Ninja Creami machine. Use the “Ice Cream” setting. After one full cycle, check the texture. It might look crumbly at first, and that’s completely normal.
Step 4: Use Re-Spin for Creaminess
Reinsert the pint and press the “Re-Spin” button. In most cases, one cycle will give you a soft-serve texture. If it still looks rough or icy, add a tablespoon of milk and spin again.
Customizing Your Vanilla Ice Cream: Make It Uniquely Yours
Once you’ve mastered the basic Ninja Creami vanilla ice cream recipe, the possibilities open up in delicious ways. You don’t have to stop at plain vanilla. In fact, you shouldn’t. The Ninja Creami was built to encourage creativity, and adding mix-ins or flavor variations is one of the best ways to make the most out of your machine.
Here are a few easy and crowd-pleasing customizations:
Flavor Ideas to Try:
- Vanilla Bean Upgrade: Swap vanilla extract with scraped vanilla bean paste for a richer, speckled finish.
- Chocolate Swirl: Add 2 tablespoons of chocolate syrup post-spin and gently stir it in for ribbons of fudge.
- Caramel Crunch: Fold in toffee bits or swirl in caramel sauce during the mix-in cycle.
- Peanut Butter Bliss: Add a spoonful of peanut butter before spinning or as a mix-in for a nutty twist.
- Espresso Kick: Mix in a teaspoon of instant espresso powder for coffee lovers.
Popular Mix-Ins:
- Mini chocolate chips
- Crushed Oreos
- Chopped nuts (walnuts, pecans)
- Fruit compotes
- Cookie dough chunks
To incorporate these properly, use the Mix-In function of your Ninja Creami. Simply carve out a small well in the center of the spun ice cream, add your mix-in, and process. This allows for even distribution without over-blending.
Texture Troubleshooting and Fixes
Even with the right ingredients, sometimes your Ninja Creami results may not be exactly what you expected on the first try. Here’s how to fix common issues without starting over.
Crumbly Texture?
This is a sign your base needs a little more liquid. Add 1–2 tablespoons of milk or cream and hit the Re-Spin button again. The second cycle usually smooths it out into that creamy consistency you’re looking for.
Too Soft or Melty?
Let it freeze a bit longer after spinning, or reduce the liquid next time. Be sure your freezer is set to at least 0°F (-18°C) to fully solidify your base.
Too Hard After Refreezing?
After your first spin, store the leftovers with a piece of plastic wrap pressed against the surface. When you want to eat it again, let it sit at room temp for 10 minutes before scooping or re-spinning.
Inspiration from Other Trusted Recipes
You’re not limited to just one version of vanilla. In fact, many home cooks have put their own spin on the classic and shared their Ninja Creami results online. For instance, you might enjoy this Vanilla Ice Cream with Chocolate Chips straight from the Ninja Test Kitchen—it adds texture without changing the core flavor.
Want a lighter, family-tested variation? Check out this simple vanilla base recipe by Margin Making Mom. It’s budget-friendly, beginner-approved, and still delivers rich results.
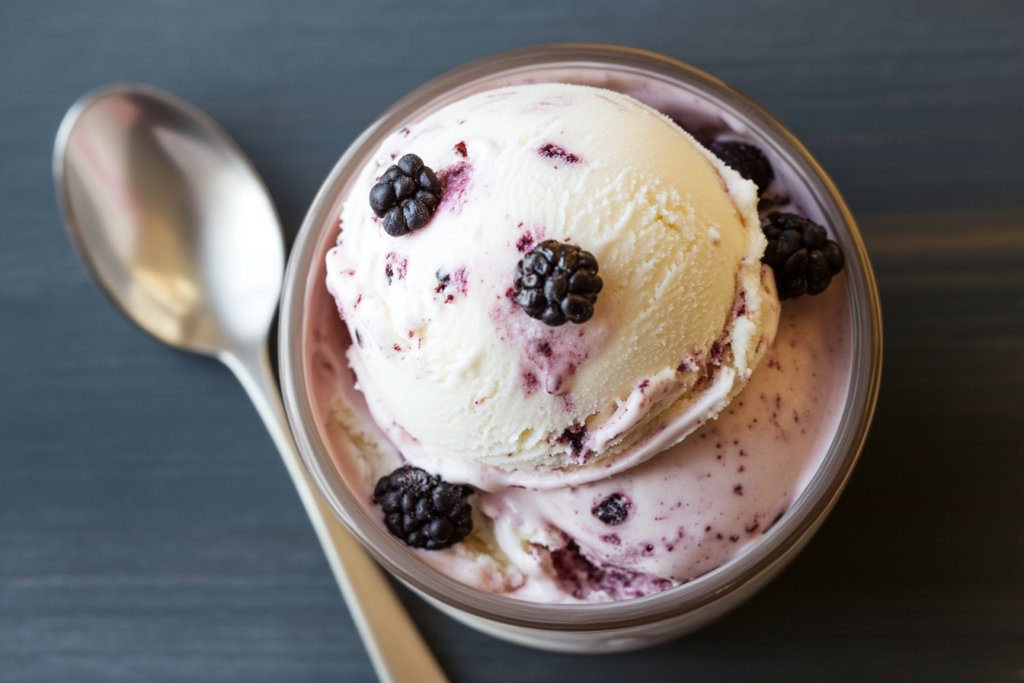
If you’re feeling adventurous, take a fruity turn with this indulgent Strawberry Cheesecake Ice Cream recipe. It uses the same Ninja Creami process but layers in strawberry flavor and graham cracker swirls for a dessert that feels straight from an ice cream shop.
How to Store Homemade Creami Ice Cream the Right Way
Your freshly spun vanilla ice cream can be stored and enjoyed later—but how you store it matters.
Storage Tips:
- Use the Original Pint Container: The Ninja Creami container is designed to maintain optimal texture.
- Wrap It Tight: Press plastic wrap or parchment against the surface before sealing the lid. This reduces ice crystal formation.
- Label and Date: If you’re making multiple batches, note the flavor and date on the lid.
Stored properly, your ice cream stays fresh for up to two weeks. For longer storage, a quick Re-Spin brings it back to life.
Frequently Asked Questions About Ninja Creami Vanilla Ice Cream Recipe
How long does it take to make vanilla ice cream in the Ninja Creami?
You’ll need to freeze your base for at least 24 hours before spinning. Once frozen, the processing itself takes about 2–3 minutes. So while it’s not instant, it’s much faster and easier than traditional methods.
Why does my Ninja Creami vanilla ice cream come out crumbly?
Crumbly texture usually means the base didn’t have enough fat or liquid. You can fix it by adding a tablespoon of milk and using the Re-Spin function. This typically smooths it into the rich, creamy texture you’re expecting.
Can I use plant-based milk for this recipe?
Yes, absolutely. Oat milk, coconut milk, or almond milk work well, though you might want to increase the fat content by adding a bit of coconut cream or dairy-free creamer. This helps maintain a smooth texture post-spin.
Can I double the recipe?
Each pint container holds a single batch, so while you can’t double it in one container, you can prepare multiple pints in advance. Just follow the same process for each batch.
How do I clean the Ninja Creami?
The container, paddle, and lid are top-rack dishwasher safe, but you can also hand wash with warm soapy water. Avoid using abrasive pads, especially on the spinner blade.
Final Thoughts: Why This Recipe Is a Game-Changer
The Ninja Creami vanilla ice cream recipe offers more than a way to beat the heat—it gives you the freedom to control every ingredient, satisfy your cravings, and experiment endlessly. It fits effortlessly into your lifestyle whether you’re dairy-free, sugar-conscious, or just someone who appreciates a scoop of something sweet at the end of the day.
This isn’t just about ice cream. It’s about having a go-to treat that never disappoints, no matter how many times you make it.