


Introduction: A Dreamy Dessert for Every Occasion
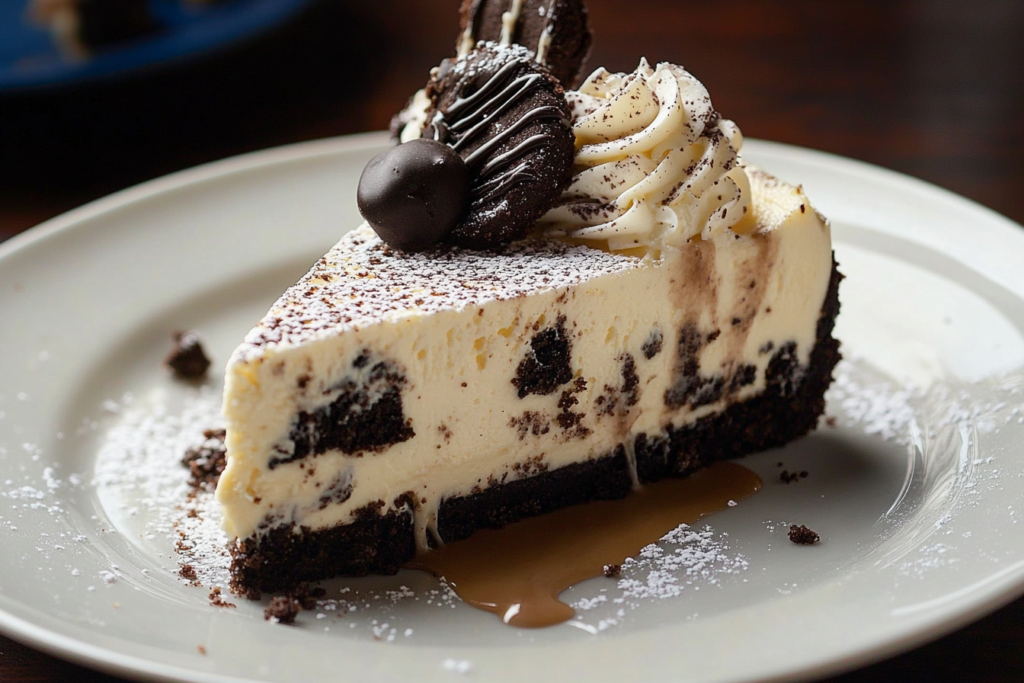
Imagine slicing into a velvety cheesecake, the creamy filling speckled with chocolate cookie crumbles, all resting on a crisp, buttery Oreo crust. If you’re a fan of rich, decadent desserts, cookies and cream cheesecake is the perfect indulgence. The combination of smooth, tangy cream cheese and the satisfying crunch of crushed cookies makes this treat irresistible.
Maybe you’ve had a slice at a bakery or a restaurant and thought, “Could I make this at home?” The answer is a resounding yes. Not only is homemade cookies and cream cheesecake surprisingly simple to prepare, but it also allows you to control the flavors, sweetness, and texture. Whether you’re baking for a special occasion or just craving something indulgent, this guide will walk you through every step, ensuring your cheesecake turns out perfectly creamy and full of chocolatey goodness.
By the time you finish reading, you’ll know how to create a cookies and cream cheesecake that rivals any bakery’s version. From selecting the right ingredients to achieving the ideal texture, every detail is covered.
Table of Contents
What is Cookies and Cream Cheesecake?
At its core, cookies and cream cheesecake is a luxurious dessert that blends the richness of traditional cheesecake with the crunch and flavor of chocolate sandwich cookies. The base is typically made from crushed Oreos mixed with melted butter, forming a sturdy foundation that contrasts beautifully with the silky filling. The cheesecake itself consists of cream cheese, sugar, eggs, vanilla extract, and, of course, crushed cookies incorporated throughout.
Why You’ll Love This Cheesecake
- Perfect Balance of Creamy and Crunchy – The smooth cheesecake filling is complemented by the slightly crisp cookie bits.
- Easy to Customize – You can adjust the sweetness, add toppings, or even make a no-bake version.
- Crowd-Pleasing Dessert – Whether for birthdays, holidays, or casual get-togethers, this cheesecake never disappoints.
- Make-Ahead Friendly – Cheesecakes taste even better after chilling overnight, making them perfect for planning ahead.
Ingredients for Cookies and Cream Cheesecake
Before you start, having the right ingredients is essential. The key to achieving the best texture and flavor is using quality components.
H3: Essential Ingredients
Here’s what you’ll need to make a classic cookies and cream cheesecake:
- Crust
- Oreo cookies (with filling intact)
- Unsalted butter (melted)
- Cheesecake Filling
- Cream cheese (softened to room temperature)
- Granulated sugar
- Eggs
- Vanilla extract
- Sour cream (adds richness and a slight tang)
- Crushed Oreo cookies
- Topping (Optional but Recommended)
- Whipped cream
- Additional crushed Oreos
Ingredient Breakdown for Easy Reference
| Ingredient | Quantity |
|---|---|
| Oreo Cookies (for crust) | 24 cookies |
| Unsalted Butter (melted) | 5 tbsp |
| Cream Cheese (softened) | 24 oz (3 blocks) |
| Granulated Sugar | 3/4 cup |
| Eggs | 3 large |
| Vanilla Extract | 2 tsp |
| Sour Cream | 1/2 cup |
| Heavy Whipping Cream (for topping) | 1 cup |
| Crushed Oreo Cookies (for mix-in and topping) | 10-12 cookies |
Step-by-Step Guide to Making Cookies and Cream Cheesecake

Perfecting a homemade cheesecake requires attention to detail. Follow these steps to ensure a smooth, crack-free cheesecake with the ideal balance of flavors.
1️⃣ Making the Oreo Crust
A solid crust is the foundation of any cheesecake, and using Oreos adds a rich, chocolatey crunch that perfectly complements the creamy filling.
- Crush the cookies – Use a food processor to turn 24 Oreo cookies into fine crumbs. If you don’t have a processor, place the cookies in a sealed bag and crush them with a rolling pin.
- Mix with butter – Stir in 5 tablespoons of melted butter until the crumbs are evenly coated.
- Press into the pan – Firmly press the mixture into the bottom of a springform pan, ensuring an even layer.
- Pre-bake the crust – Bake at 325°F (163°C) for 10 minutes, then let it cool before adding the filling.
2️⃣ Preparing the Creamy Cheesecake Filling
Achieving a silky texture requires the right technique and a gentle hand.
- Beat the cream cheese and sugar – Using a hand or stand mixer, blend 24 ounces of softened cream cheese with ¾ cup of granulated sugar until smooth.
- Add eggs one at a time – This prevents overmixing, which can introduce air bubbles and lead to cracks.
- Incorporate sour cream and vanilla – These ingredients enhance the richness and depth of flavor.
- Fold in crushed Oreos – Gently stir in 10-12 crushed Oreo cookies for that signature cookies-and-cream texture.
3️⃣ Baking the Cheesecake to Perfection
Baking at the right temperature and using the right techniques ensures a creamy consistency.
- Use a water bath – Wrap the springform pan in foil and place it in a larger pan filled with hot water. This helps regulate temperature and prevents cracking.
- Bake at 325°F (163°C) for 50-55 minutes – The edges should be set, but the center should still have a slight jiggle.
- Cool gradually – Turn off the oven, crack the door open, and let the cheesecake sit for an hour before transferring it to the fridge.
4️⃣ Cooling and Chilling for the Best Flavor
After baking, the cooling process is just as crucial as the baking itself to ensure a perfect texture. Rushing this step can cause cracks and affect the final texture.
- Turn off the oven and crack the door open – Let the cheesecake sit inside the oven for an hour to gradually adjust to room temperature.
- Cool completely at room temperature – Remove the cheesecake from the oven and let it sit on the counter for another hour.
- Refrigerate for at least 4 hours, preferably overnight, to allow the flavors to meld and the cheesecake to set properly.
Skipping the chilling step will result in a soft cheesecake that doesn’t hold its shape well. For the best consistency, overnight chilling is recommended.
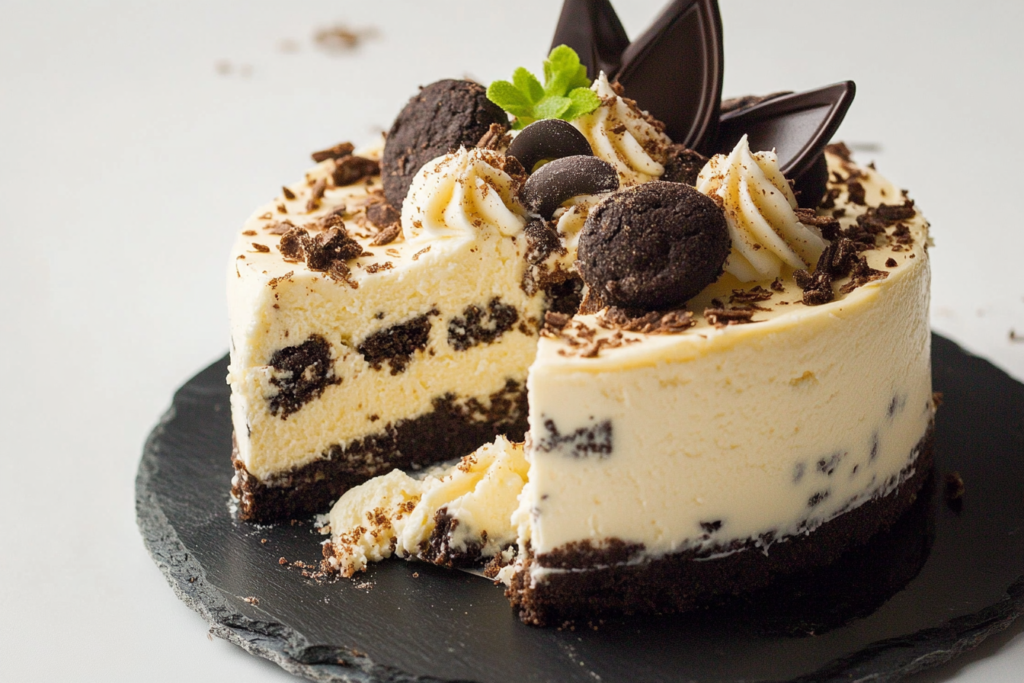
5️⃣ Adding the Final Touch – Topping & Garnish
A cookies and cream cheesecake isn’t complete without a little extra indulgence. Toppings enhance both the flavor and the visual appeal of the dessert.
Whipped Cream and Extra Oreos
- Pipe or spread freshly whipped cream on top for a light, airy contrast to the dense cheesecake.
- Crush extra Oreo cookies and sprinkle them over the whipped cream for a decorative touch.
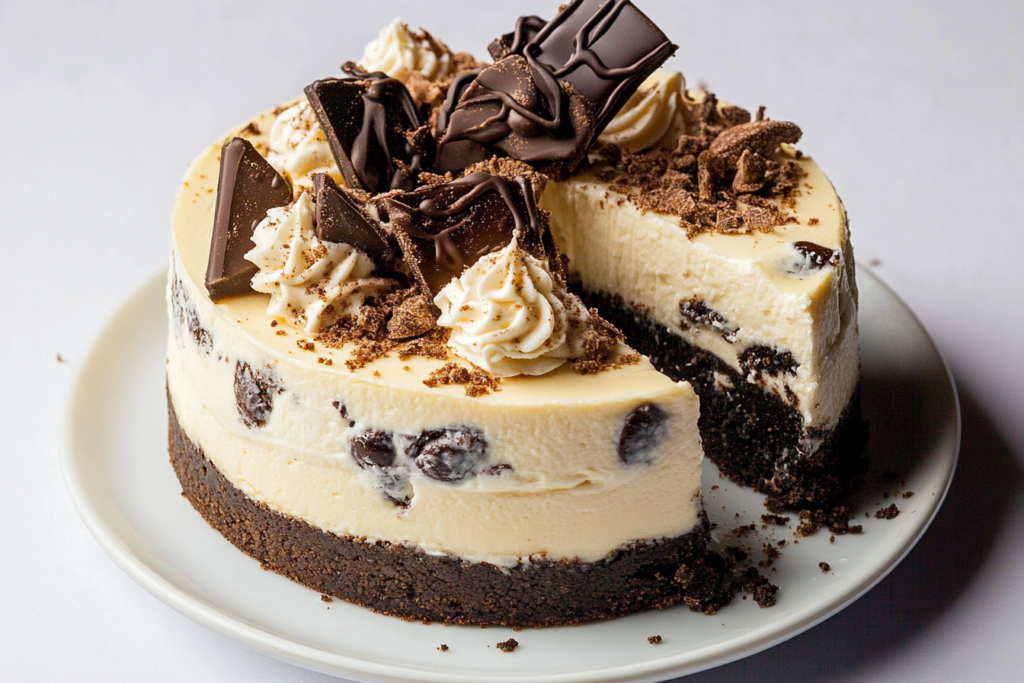
Chocolate Drizzle
- Melt some chocolate and drizzle it over the cheesecake for an extra layer of richness.
Oreo Halves for Decoration
- Place whole or halved Oreo cookies around the edges of the cheesecake for a bakery-style presentation.
Once decorated, keep the cheesecake refrigerated until ready to serve.
Tips for the Perfect Cookies and Cream Cheesecake
Even experienced bakers encounter challenges with cheesecake. Here are some expert tips to help you avoid common pitfalls and ensure your dessert turns out flawless.
Avoiding Cracks in Cheesecake
- Don’t overmix the batter – Too much air can cause cracks when baking.
- Use a water bath – This keeps the baking temperature even and prevents the cheesecake from drying out.
- Let it cool gradually – Sudden temperature changes cause cracks. Always cool in stages.
Getting the Perfect Texture
- Use full-fat cream cheese – Low-fat versions can lead to a grainy texture.
- Bring ingredients to room temperature – Cold cream cheese won’t blend smoothly.
Best Oreo-to-Cheesecake Ratio
- Adding too many Oreos to the batter can make the filling dry or overly thick. Stick to 10-12 crushed cookies for the perfect balance.
Storing & Freezing Tips
- Refrigerate leftovers in an airtight container for up to 5 days.
- Freeze for later – Wrap slices in plastic wrap and store them in an airtight container for up to 3 months.
Fun Variations of Cookies and Cream Cheesecak

Looking to switch things up? Try these creative variations for a unique twist on the classic recipe.
No-Bake Cookies and Cream Cheesecake
- Skip the oven and use gelatin or whipped cream for stability. This is a great option when you want a quick, hassle-free dessert.
Mini Oreo Cheesecakes
- Make individual servings by using a muffin tin lined with cupcake wrappers. These are perfect for parties and portion control.
Chocolate Lover’s Cookies and Cream Cheesecake
- Add a layer of melted chocolate between the crust and the cheesecake filling for extra decadence.
Gluten-Free Option
- Use gluten-free chocolate sandwich cookies in place of regular Oreos for a gluten-free version.
Frequently Asked Questions (FAQs)
How do I know when my cheesecake is done baking?
Your cheesecake is done when the edges are set, but the center has a slight jiggle. Avoid overbaking to maintain a creamy texture.
Can I make this cheesecake without a water bath?
Yes, but a water bath helps prevent cracks and keeps the cheesecake creamy. If skipping the water bath, bake at a lower temperature and keep an eye on the texture.
What’s the best way to crush Oreos for the crust?
Using a food processor ensures a fine, even crumb. If you don’t have one, place the cookies in a ziplock bag and crush them with a rolling pin.
Can I freeze cookies and cream cheesecake?
Absolutely! Wrap individual slices tightly in plastic wrap and store them in an airtight container in the freezer for up to 3 months. Thaw in the fridge before serving.
How can I make this cheesecake extra rich and creamy?
Using full-fat cream cheese, room-temperature ingredients, and a slow mixing technique ensures the creamiest cheesecake. Also, adding sour cream gives it a smoother texture.
Conclusion – The Perfect Dessert for Any Occasion
Cookies and cream cheesecake is a dessert that never fails to impress. With its buttery Oreo crust, creamy cheesecake filling, and chunks of chocolate cookies throughout, it’s the ultimate treat for cheesecake lovers. Whether you’re making it for a holiday, a special celebration, or just a weekend indulgence, following these steps will guarantee a bakery-quality result every time.
If you’re interested in exploring more variations, check out this Cookies and Cream Cheesecake Recipe from Cooking Classy here. And if you’re a fan of creative, indulgent desserts, don’t miss this S’mores Cookie Recipe from MyRecipesEra—a perfect mix of gooey chocolate, marshmallow, and graham cracker flavors.
Now that you have all the tips and tricks, it’s time to put them to the test. Gather your ingredients, preheat your oven, and start baking! Let us know how your cookies and cream cheesecake turns out in the comments, and don’t forget to share this recipe with fellow dessert lovers.