
Introduction: The Irresistible Charm of Pignoli Cookies
There’s something undeniably special about a recipe that has been passed down for generations. Pignoli cookies, a staple in Italian bakeries and homes, have a unique charm that instantly transports you to a cozy kitchen filled with the warm, nutty aroma of pine nuts and almonds. Whether you have childhood memories of enjoying these delicate treats with family or are discovering them for the first time, this recipe offers an authentic taste of Italian tradition.
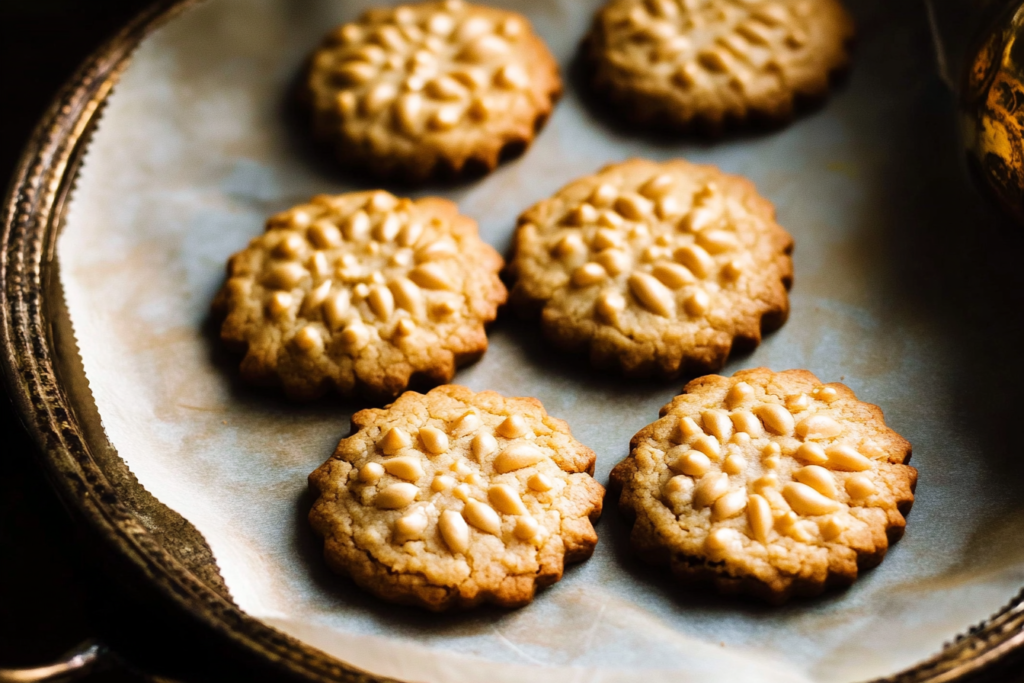
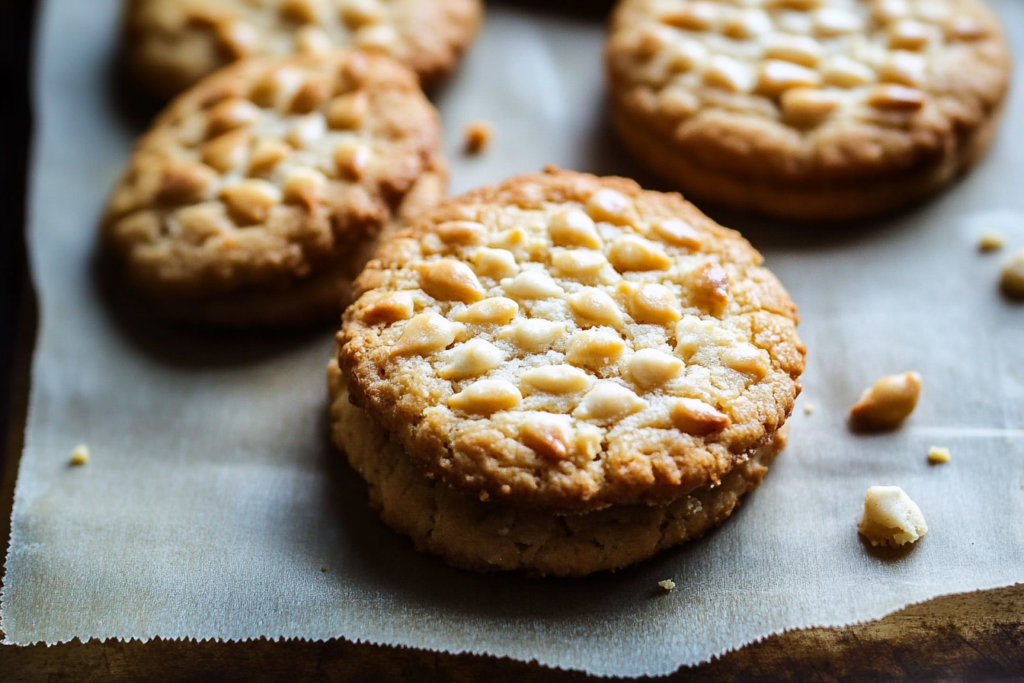
With their crisp exterior, soft and chewy center, and a generous coating of pine nuts, pignoli cookies are a true delicacy. They are simple to make, require only a handful of ingredients, and are naturally gluten-free. Perfect for special occasions or as an everyday indulgence, these cookies showcase the elegance of classic Italian baking.
This guide will walk you through every step of the process, from selecting the right ingredients to mastering the perfect texture. By following these instructions, you’ll be able to bake pignoli cookies that rival those from the finest Italian bakeries.
Table of Contents
Ingredients for Pignoli Cookies
To achieve the authentic flavor and texture of traditional pignoli cookies, using high-quality ingredients is essential. Below is a complete list of what you’ll need.
| Ingredient | Measurement |
|---|---|
| Almond Paste | 8 oz |
| Granulated Sugar | ½ cup |
| Powdered Sugar | ½ cup |
| Egg Whites | 2 large |
| Vanilla Extract | ½ tsp |
| Pine Nuts | 1 cup |
| Salt | ¼ tsp |
Why These Ingredients Matter
- Almond Paste: The foundation of this recipe, providing the rich, nutty flavor and chewy texture. Ensure you’re using pure almond paste, not marzipan, which contains additional sweeteners.
- Pine Nuts: These small, buttery nuts add a delicious crunch and enhance the cookie’s signature taste. Fresh, high-quality pine nuts are crucial for the best results.
- Egg Whites: They bind the dough together while keeping it light and airy.
- Powdered and Granulated Sugar: A combination of both ensures a perfect balance of sweetness and texture.
- Vanilla Extract: Adds depth to the almond flavor, complementing the nutty profile.
- Salt: A pinch enhances the sweetness and rounds out the overall taste.
Now that you have the ingredients ready, let’s move on to the step-by-step process of making these classic Italian cookies.
How to Make Pignoli Cookies – Step-by-Step Guide
1. Preparing the Dough
The dough for pignoli cookies is simple, but handling it correctly is key to achieving the perfect texture.
- Set your oven to 350°F (175°C) and line a baking sheet with parchment paper. This helps prevent the cookies from sticking and promotes even baking.
- In a food processor, combine almond paste, granulated sugar, and powdered sugar. Blend until the mixture has a fine, crumbly consistency.
- Add egg whites and vanilla extract, then pulse until a sticky dough forms. The dough should be thick yet smooth, making it easy to shape.
💡 Pro Tip: If your dough is too wet, let it sit for 5-10 minutes to firm up before shaping.
2. Shaping and Coating the Cookies
Now that the dough is ready, it’s time to form the cookies and coat them in pine nuts for their signature crunch.
- Scoop out small portions of dough (about 1 tablespoon each) and roll them into smooth, even balls.
- Pour the pine nuts onto a plate and gently roll each dough ball in the nuts, pressing lightly to ensure they stick evenly.
- Place the coated cookies on the prepared baking sheet, leaving at least 1 inch of space between them to allow for slight spreading.
💡 Pro Tip: If the pine nuts don’t stick well, slightly dampen your hands before rolling the dough in them.
3. Baking to Perfection
- Transfer the baking sheet to the preheated oven and bake for 15-18 minutes, or until the cookies turn a light golden brown.
- The edges should be firm, but the center will remain slightly soft. Pignoli cookies continue to firm up as they cool.
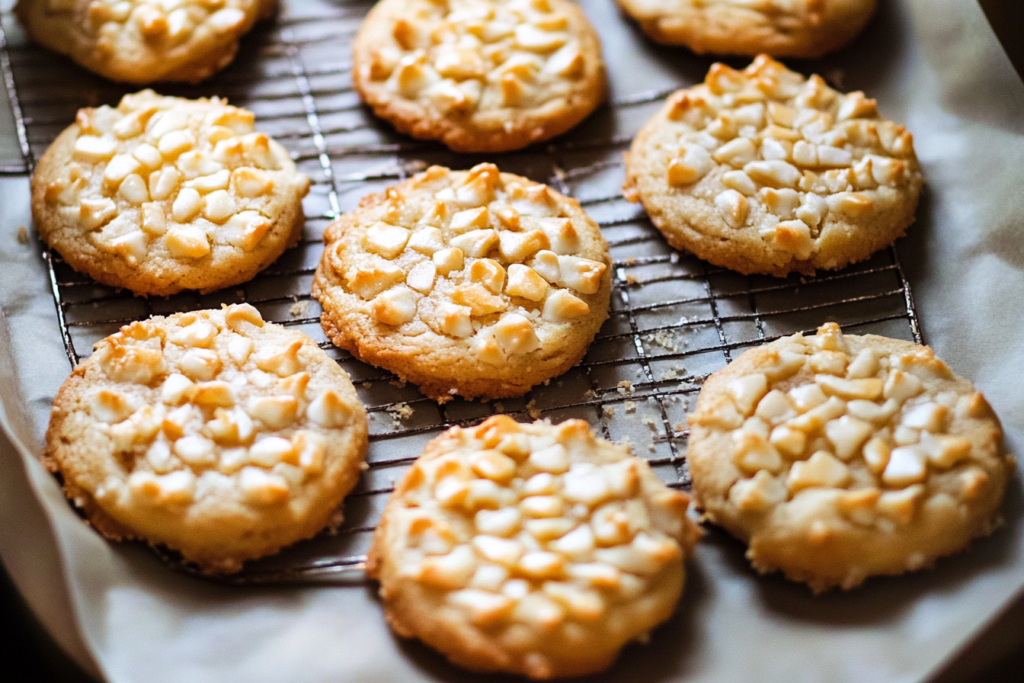
- Allow the cookies to cool on the baking sheet for 5 minutes, then transfer them to a wire rack to cool completely.
💡 Pro Tip: Avoid overbaking, as it can dry out the cookies. The ideal pignoli cookie has a delicate balance between a crisp shell and a chewy interior.
Baking Tips & Storage
Making pignoli cookies isn’t difficult, but a few expert tips will help you perfect the process.
Expert Baking Tips
✔ Use fresh pine nuts: Stale nuts can make the cookies taste bitter. Always check for freshness before using them.
✔ Chill the dough if too sticky: If the dough is hard to handle, refrigerate it for 15 minutes before rolling.
✔ Don’t overmix: Overworking the dough can result in dense cookies. Mix just until combined.
How to Store Pignoli Cookies
Proper storage ensures your cookies remain fresh and delicious for days.
- Room Temperature: Keep in an airtight container for up to 1 week.
- In the Freezer: Place in a sealed freezer-safe bag and freeze for up to 3 months. Thaw at room temperature before serving.
💡 Pro Tip: Layer the cookies with parchment paper to prevent them from sticking together.
Nutritional Information – What’s Inside Pignoli Cookies?
Pignoli cookies are known for their rich, nutty flavor and naturally gluten-free ingredients. While they are an indulgence, they also provide some nutritional benefits from almonds and pine nuts, including healthy fats and protein. Below is the approximate nutritional breakdown per cookie (based on standard ingredient portions).
| Nutrient | Amount Per Cookie |
|---|---|
| Calories | ~120 kcal |
| Carbohydrates | ~14g |
| Protein | ~3g |
| Fat | ~6g |
| Sugar | ~10g |
| Sodium | ~20mg |
Are Pignoli Cookies Healthy?
While pignoli cookies are a sweet treat, they contain nutrient-dense ingredients that make them a better alternative to many store-bought baked goods. The almond paste provides healthy monounsaturated fats, while pine nuts offer essential minerals like magnesium and zinc.
That said, these cookies are still high in sugar, so they are best enjoyed in moderation as part of a balanced diet.
💡 Pro Tip: Want a lower-sugar version? Reduce the granulated sugar by a couple of tablespoons or substitute it with a natural sweetener like coconut sugar.
Why Pignoli Cookies Are a Classic Italian Favorite
Pignoli cookies have a long-standing history in Italian cuisine, particularly in the southern regions such as Sicily. Traditionally, these cookies were served during holidays, weddings, and special gatherings, symbolizing warmth and hospitality.
What Makes Them Special?
✔ Simple, High-Quality Ingredients – No artificial flavors, just real almonds, pine nuts, and natural sweetness.
✔ Naturally Gluten-Free – Perfect for those with gluten sensitivities.
✔ Distinctive Nutty Flavor – Unlike other cookies, the combination of almonds and pine nuts creates a unique, rich taste.
✔ Perfect Balance of Chewy and Crunchy – A crisp exterior from pine nuts, with a soft, chewy almond center.
If you’ve ever visited an authentic Italian bakery, you’ve likely seen these golden, pine nut-crusted cookies sitting among biscotti, amaretti, and cannoli. They are timeless, and now you can make them fresh in your own kitchen.
Creative Variations of Pignoli Cookies
Looking to experiment? While traditional pignoli cookies are unbeatable, here are a few ways to customize the recipe.
1. Chocolate-Dipped Pignoli Cookies
- Melt dark or semi-sweet chocolate and dip half of each cooled cookie into it.
- Let them harden on parchment paper before serving.
2. Lemon-Infused Pignoli Cookies
- Add 1 teaspoon of lemon zest to the dough for a refreshing citrus twist.
3. Espresso Pignoli Cookies
- Mix ½ teaspoon of espresso powder into the dough for a subtle coffee flavor.
4. Cinnamon-Spiced Pignoli Cookies
- Sprinkle a bit of cinnamon into the sugar coating before baking.
No matter how you tweak the recipe, the core elements remain the same—the signature pine nut crust and chewy almond interior.
Frequently Asked Questions (FAQs)
1. Why Do My Pignoli Cookies Spread Too Much?
Excess spreading can happen if the dough is too warm or wet. Try chilling it for 10-15 minutes before shaping to help maintain a rounder shape.
2. Can I Make Pignoli Cookies Without a Food Processor?
Yes! While a food processor makes the process easier, you can break up the almond paste with a fork or electric mixer. The key is to ensure the dough is well-mixed.
3. How Can I Keep My Pine Nuts from Burning?
Since pine nuts are delicate, they can brown too quickly in the oven. To prevent this:
- Lightly press the pine nuts into the dough so they don’t stick out too much.
- If your oven runs hot, bake at 325°F instead of 350°F.
4. What’s the Difference Between Almond Paste and Marzipan?
- Almond paste has a higher almond content and less sugar, making it ideal for baking.
- Marzipan is sweeter, used more for candy and decorations rather than cookies.
5. Can I Freeze Pignoli Cookie Dough?
Absolutely! Form the dough balls, roll them in pine nuts, then freeze on a baking sheet. Once frozen, transfer them to a sealed bag and bake straight from the freezer when needed.
Serving Suggestions – Best Ways to Enjoy Pignoli Cookies
These cookies are delicious on their own, but pairing them with the right beverage enhances their flavor.
✔ With Espresso or Cappuccino – A classic Italian pairing for an afternoon treat.
✔ With Dessert Wine – Pignoli cookies complement Vin Santo or Moscato beautifully.
✔ As a Gift – Pack them in a decorative tin for a thoughtful homemade present.
Whether you serve them fresh from the oven or days later, their rich almond aroma and nutty crunch make them irresistible.
Coming Up in Part Three
In the final section, we’ll wrap up with a compelling conclusion, a call to action, and tips for making your pignoli cookies stand out even more. Stay tuned for the last installment!
Final Thoughts – Why You Should Make Pignoli Cookies Today
There’s a reason pignoli cookies have stood the test of time. Their simple ingredients, incredible texture, and rich flavor make them a standout treat that you can enjoy for any occasion. Whether you’re making them for a holiday gathering, gifting them to loved ones, or simply indulging in a homemade Italian bakery-style cookie, this recipe delivers perfect results every time.
The best part? They’re incredibly easy to make. With just a handful of ingredients and minimal prep time, you can whip up a batch in under 30 minutes. No complicated techniques—just pure almond goodness, crunchy pine nuts, and a perfectly chewy bite.
If you’ve never tried making pignoli cookies at home, now is the perfect time to start. Follow the steps outlined in this guide, experiment with a few flavor variations, and most importantly—enjoy the process of baking a traditional Italian classic right in your own kitchen.
Expert Tips for the Best Pignoli Cookies
Before you get started, keep these final expert tips in mind to ensure baking success.
✔ Use high-quality almond paste – This is the heart of the recipe. Low-quality or imitation almond paste won’t provide the same rich, nutty flavor.
✔ Don’t overbake – These cookies should be light golden brown. Avoid overbaking, as it can dry them out—keep a close eye on them.
✔ Ensure pine nuts stick properly – Slightly dampening your hands or rolling the dough in a thin coat of sugar before adding the pine nuts can help them adhere better.
✔ Give them space – Pignoli cookies do spread slightly, so leave enough room on the baking sheet.
✔ Enjoy them fresh – While they store well, they taste best the day they’re baked, when the exterior is crisp and the center is perfectly chewy.
Share Your Baking Experience!
If you’re a fan of gourmet cookies, be sure to check out this delicious guide on Crumbl Cookies at My Recipes Era. This article explores the flavors, textures, and baking secrets behind these famous cookies, helping you recreate their signature soft, thick, and decadent treats right in your own kitchen. Whether you’re a cookie lover or just looking for a fun new recipe to try, this is a must-read!
Now that you have a foolproof pignoli cookie recipe, it’s time to put it to the test. Try baking a batch, and let us know how they turn out!
- Have you made pignoli cookies before?
- Did you try any of the creative variations mentioned?
- What’s your favorite way to enjoy these delicious Italian treats?
We’d love to hear from you! Leave a comment below and share your experience.
And if you enjoyed this guide, don’t forget to share it with friends and family who love Italian baking. Happy baking!